The construction of a sloping roof is the most complex project of all possible types of roofs. But, despite this, such roofs are invariably popular, and all thanks to the additional room created in the attic floor, which is comparable in size to the area of the building itself.
Content
Broken Roof Overview

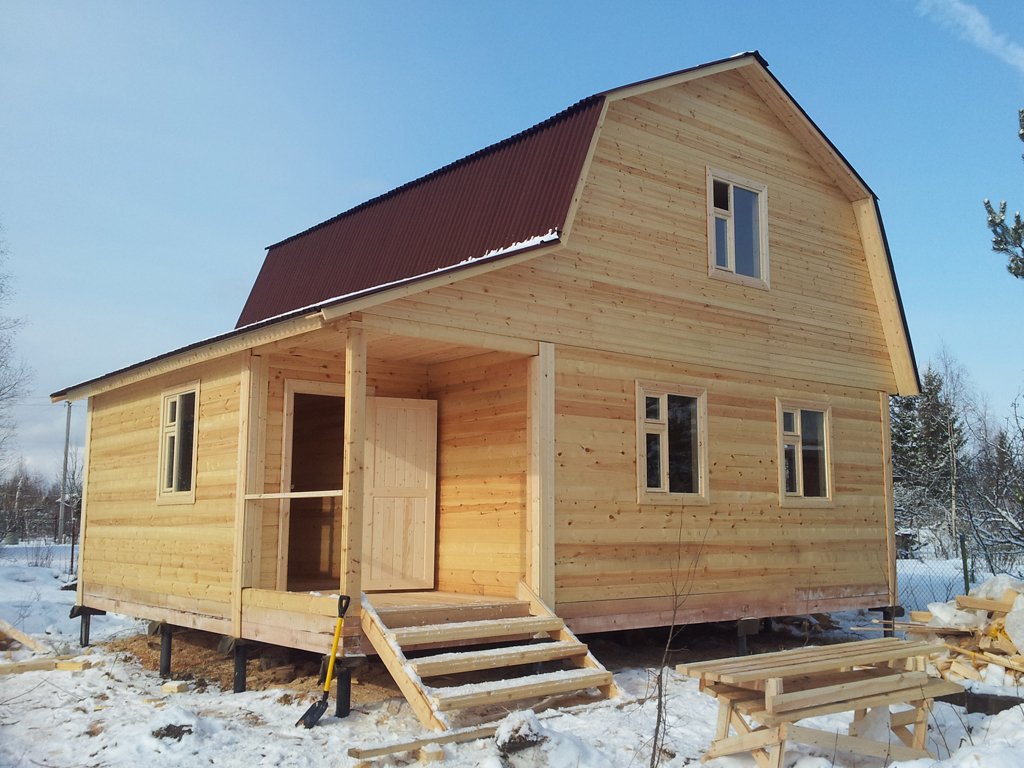
The most common among broken roofs today are mansard four-gable roofs. This happened mainly because such designs allow the most optimal use of the internal attic space. That is why a sloping roof is the best choice for those who advocate high functionality and spaciousness of the house.
Houses with a sloping roof look very peculiar, and with the proper quality of work, your house will delight all the people passing by.
Basically, such roofs are erected on wide buildings.

The required width of the house for installing broken roof structures is approximately 6 m. If your house is already narrow, the attic space will be spent less efficiently, and if it is wider, it will be much more difficult to plan and install a reliable and high-quality rafter system.
Do not be afraid of the significant dimensions of the structure, installation can be done independently. The rafter system of a sloping roof is usually assembled according to a modular system: individual parts are prepared for assembly on the ground, then they rise up and only there are installed. Therefore, you are unlikely to need the help of heavy construction equipment.
Varieties of broken roofs
Depending on the number of slopes, the following types of roofs are distinguished: single-pitched, double-pitched, three-and four-pitched. The comfort of the house, as well as the reliability of the entire building, often depends on this parameter.
The shed roof has the form of an inclined plane, mounted on walls of different heights. This solution is very common, as it involves the creation of a fairly simple rafter system.
The gable roof consists, respectively, of two slopes directed in diametrically opposite directions. This type of roof is very convenient in operation, and therefore is most popular. Vaulted roofs are mainly characteristic of rectangular buildings.
The three-sloping broken roof at the end has one vertical wall, and the second end is made with the same kinks of the profile as the side slopes of the roof. This design has a small weight due to the lack of one main wall. The gable roof is most often equipped when the roof of the attic floor is mated with the roof of another part of the residential building.
The four-pitched roof has broken profiles along all four slopes of the wall. This is the most difficult version of a sloping roof from a technical point of view. But such a design has the lightest weight.
At the request of the client, you can create a project with any number of slopes, but in practice it is used very rarely due to the difficulties in the subsequent construction of the roof.
The design of a sloping roof in shape can be completely different.In most cases, it has the appearance of a parabola, and is most often found in rectangular houses. The slopes are trapezoidal on the long sides and triangular in the short.
Half-hip structures are a type of four-sloping sloping roof. The half-hip has the appearance of an end ramp, while the end face of the gable roof does not cut it off entirely, but only its lower and upper part.
There are also tent roofs. The following varieties are attributed to them: conical, domed, pyramidal structures. Most often they are installed on buildings of round or polygonal shape. Such designs are least common due to the complexity of design and installation.
Sloping roof construction: start planning
Before you begin work on the installation of the roof, it must be carefully designed, as well as carry out all the necessary calculations for the design, create its plan.

The project of a sloping roof usually provides that the slope of the slopes is from 5 to 60 °. First of all, it depends on the atmospheric effects, the purpose of the attic, as well as the type of roofing material used.

In regions with frequent and heavy precipitation, the slope of the roof slopes should be sufficiently large (from 45 to 60 °). In areas with strong and frequent winds, but rare rains, a much smaller slope will be enough.
If the angle of inclination is from about 5 to 20 °, it is recommended to use a roll coating: in the range from 14 to 60 ° - asbestos-cement sheets or roofing metal; in the range from 30 to 60 ° - tile.
The desired height of the roofing ridge is calculated using the trigonometric expression for rectangular triangles (you can easily find it in any school textbook on geometry).
Surely, you have already asked yourself the question, how to build a broken roof without such serious preparations? It's simple - invite professionals to design the building.
But if you are determined at this stage to do everything yourself, then we advise you to start the most important thing first. Calculation of the rafter system is the basis of the entire house project. The cross section of the rafters is determined depending on the likely future loads (the weight of the rafter structures, the roof cake, as well as the strength of external influences), and the degree of roof slope. With the help of calculations, the necessary step between the rafters is also found, their bearing capacity is determined.
The plan of the rafter system provides for the type of rafters that are advisable to use during construction - overhang or hanging. It is also found out whether additional elements, such as braces, puffs, etc. are useful.
It happens that the standard dimensions of lumber are not suitable for roofing. It doesn’t matter! They can be slightly modified. For example, you can increase the rafters to the desired length or double the beams. In addition, glued or stacked rafters can be used (they are much more powerful and longer than usual).
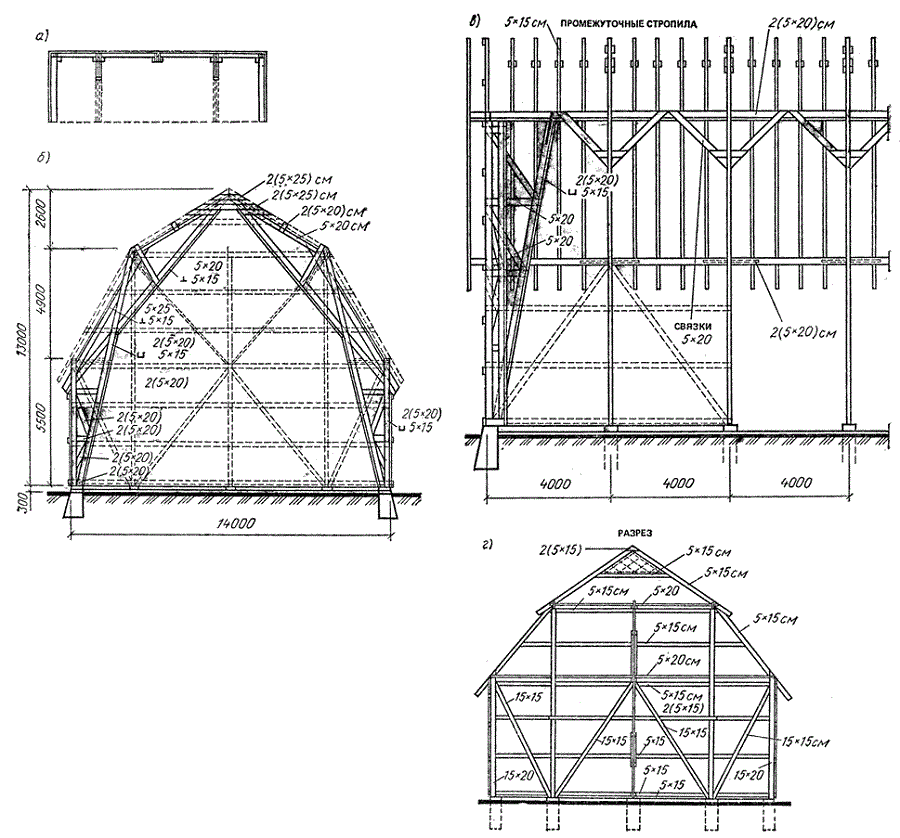
As you already understood, you cannot do without a plan in order to properly equip such an object as a broken roof. We decided to present you a drawing a little lower (just for your building you can improve it, this is just an approximate plan).
The preparatory stage of installation: we collect the necessary tools and materials
For independent construction of a sloping roof, the following objects will come in handy:
- First of all, wood. The most commonly used thick timber and edged boards from conifers. Mauerlat (support around the perimeter of the building), rafters, braces are made of timber. From the edged boards make the rest of the necessary elements.
- To create a counter and just a crate, you will need wooden slats.
- To join the roof rafters, plywood with a significant sheet thickness will be needed.
- Steel brackets, studs (diameter 8-12 mm), self-tapping screws, staples made of galvanized metal will be needed to connect the boards, boards, as well as strengthen the roofing.
- You will also need any waterproofing material, insulation and roofing directly.
- Must have a set of carpentry, carpentry tools.
Before proceeding with the installation of the sloping roof itself, it is necessary to properly treat the wood with special compounds that protect against rot and prevent fires.
When processing wood, use a wide, flat brush. The composition must be applied twice, while waiting for the complete drying of the previous applied layer. This ensures the maximum penetration of protective substances into the pores of wood.

It is undesirable to apply antiseptics and antipyretics with a spray. The work, of course, is accelerated, but the quality and depth of impregnation suffer greatly from this.
It is possible to process already prepared rafter elements with protective compounds, but in this case it is necessary to very carefully cover the joints of wooden parts, releasing the stud clip.
Construction of a rafter system of a sloping roof

After all the preparatory work is completed, you can begin to create a rafter structure. The device of a sloping roof will include the following steps:
- Based on their previously drawn plan, templates of the main elements are made. You can cope without them, but it will be more difficult (you will have to calculate the cutting angle of all rafters separately, and very accurately, since even a small error can ruin the entire system).
- The rafters are cut according to the templates, then they rise to the installation site.
- For reliable bonding of corners and good fixation, the use of plywood overlays is necessary. At the same time, plywood is attached to the rafters using self-tapping screws.
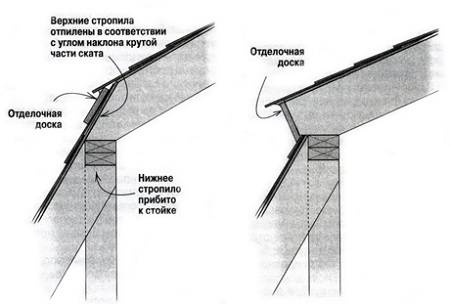
- After the upper beam joins the upper sections of the roof, as well as with the lower boundaries of the puffs of the pediment parts. The next step will be fixing the truss structure by strengthening the braces.
- Immediately after the braces are fixed, the side sections are reinforced with vertical struts. For their manufacture, a coniferous beam should be used.
Waterproofing and thermal insulation of the roofing system
For this purpose, it is best to use a roof insulation, since it is most effective in warming the ceiling and walls of the attic floor.
On top of the rafters, waterproofing and vapor-insulating layers are necessarily laid - this arrangement of the roof will protect it from leaks, and also prevent the appearance of condensate in the under-roof space. Without good insulation, there is no comfort in the room.
Waterproofing and vapor barrier materials are attached to the rafters with metal galvanized brackets using a special construction stapler. It is best to lay overlapping waterproofing panels on top of each other, without sagging (the maximum allowable sagging is no more than 2 cm).
The completion of the roof: the creation of the lathing, roofing
The technology for covering sloping roofs, despite their unusual design, is practically no different from traditional works.
Almost all types of roofing will require the creation of a wooden crate on top of the rafter system. The lathing is made of a strong, even and dry beam, which is stuffed onto the insulated and waterproofed roof through the counter rails (underlays). The system of underlays will maintain the integrity of the waterproofing, as well as provide good ventilation of the roof.
When installing the crate, watch the straightness of its segments, since even the smallest deflection or curvature can subsequently lead to violations in the tightness of the roof.
And finally, the laying of roofing material.The choice of such material depends only on your preferences and financial capabilities. The market has a huge range of products. The most optimal use of metal, it is suitable for almost all types of buildings.
Creating roof drainages

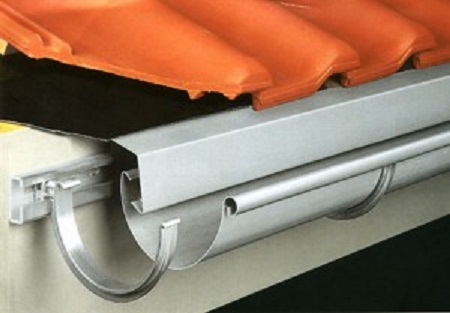
When arranging a sloping roof, you will need drainage. Without them, you will not be able to exploit your house for a long time, the roof will simply go bad. Typically, sloping roof drains are made of plastic, non-ferrous metals, or galvanized steel. Some manufacturers cover them with special polymer compounds, which are designed to increase the resistance of materials to corrosion.
Without a doubt, drainage made of non-ferrous metals - copper, aluminum or titanium - looks more attractive than their plastic counterparts. In addition, they are characterized by a very high level of resistance to external influences. But their cost is often high. Therefore, if you are limited in your means, you can choose a plastic option, but subsequently replace it with a more progressive one - a metal one.
Naturally, all of the above can only be attributed to general information about the technologies for erecting sloping roofs, since the creation of such structures is one of the most labor-intensive and complex processes in building buildings. But we hope that we have at least slightly opened the veil of secrecy over the question of how to build a sloping roof on your own. Have a nice construction!


Alas, no comments yet. Be the first!