External insulation of the house is the insulation of the roof, walls, window and door openings, sewer pipes, foundation. If you insulate the house from the outside with foam, mineral wool or other heat-insulating materials in part, then you will not get the desired result and significantly reduce spending. Only complete insulation of all structural elements is the key to a high rate of heat saving in cold weather.
Content
What thermal insulation material to choose
Conventionally, any heat-insulating materials are divided into 2 groups - the composition that hardens after application and the heaters released in the form of sheets, mats, masonry and panels. It is possible to warm the house outside with your own hands, without hiring builders, but you need to select a heat-insulating agent based on your qualifications. Nevertheless, if you use ready-made building mixtures, then all the insulation work can be done with your own hands. The most common thermal insulation products in the case of private construction are as follows:
- mineral wool;
- fur coat and plastering;
- polystyrene foam and polystyrene;
- foamed foil;
- thermal panels;
- sprayed compounds;
- masonry insulation materials.
Part of the insulation must be applied using specialized equipment.
Minvata
Warming the house outside with mineral wool is a classic technique. This insulation is used not only for wall decoration, but also for the organization of thermal insulation of foundations. This reduces humidity inside the basement and on the lower floor of a residential building. Mineral wool has both advantages and disadvantages. The main positive aspects of mineral wool are as follows:
- The insulation is produced in the form of mats of different thicknesses.
- Mats from mineral wool just cut into the desired parameters.
- Mineral wool can be attached to the wall of the building in various ways, which are specified in the manufacturer's instructions.
- The heat-insulating material is easy to use - you can make a continuous heat-insulating layer, lay the insulation in different frames or form a multilayer shield.
- Mineral wool is a cheap material that can be bought at any hardware store.
Minerals have 2 drawbacks, which are in the porosity of the insulation and the importance of caution when working. The porosity of the material, despite the fact that mineral wool does not absorb moisture, forces the protection of the fixed mats from condensation and precipitation. Mineral wool is a glass melt from which thin filaments are formed. They break easily and stick into the skin, causing itching. Protective equipment when working with mineral wool are required.
Fur coat and plastering
A simple and proven method is a thick layer of plaster and the application of mortar with slag on the wall surface. This method of warming is simple - there are already prepared for applying the mixture. With a small front of work, the price is small, especially when using a standard sand-cement mixture. In addition, with the help of such compositions it is easy to adjust the thickness of the insulating layer.
A layer of 50 mm eliminates the formation of condensate, and a larger one along with the secondary "coat" will reduce thermal conductivity.
Steel mesh reinforcement helps to adjust the thickness of the plaster layer. In this case, insulation can be applied to any type of wall - it is even possible to plaster surfaces with noticeable roughness. But, plaster, in comparison with other heaters, is characterized by the lowest values of thermal protection. Nevertheless, the versatility of application and ease of use have contributed to the development of new versions of warm plaster with the following properties:
- thermal insulation parameters equal to mineral wool;
- a small layer - it is recommended to apply no more than 50 mm;
- sufficient porosity;
- light weight plaster.
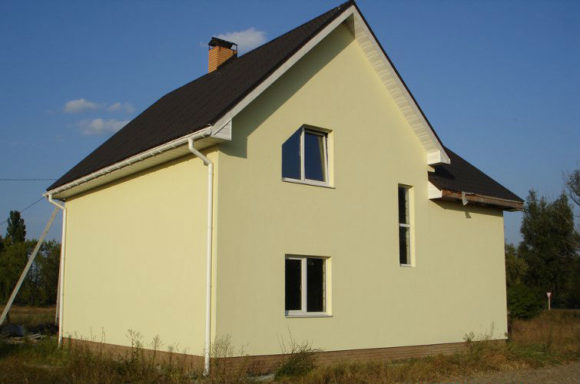
Warm plaster has no limitations in the case of a secondary finish - it can be used in virtually any circumstances. However, this plaster alone cannot always provide the minimum thermal conductivity of the exterior walls of a residential building. But, the use of these building mixtures as an auxiliary method of thermal insulation of facades helps to obtain a flat surface and lower heat loss indicators.
Polystyrene and Styrofoam
Extruded polystyrene foam and polystyrene are common materials used for external thermal insulation works in private construction. These similar products with minimal thermal conductivity have many advantages that often become key in choosing a heater. In addition, insulation sheets help to get rid of small surface irregularities of the insulated walls. The main positive properties of extruded polystyrene foam or polystyrene are the following qualities:
- light weight;
- good thermal insulation parameters;
- several way fasteners;
- moisture resistance;
- not a medium for the development of bacteria;
- surface treatment eliminates the formation of mold;
- fixed sheet thickness.
Outside, polystyrene is insulated with residential buildings due to the fact that it has thermal insulation characteristics 30% higher than that of polystyrene. At the same time, expanded polystyrene is 5 times stronger. But, the costs when using extruded polystyrene foam are higher than if the structure is insulated with foam.
However, these thermal insulation sheets have drawbacks, the main among which is zero vapor permeability. In addition, the disadvantages are fragility (primarily foam) and the release of harmful substances under the influence of high temperatures. But, these negative aspects are easy to level. This has led to the choice of polystyrene foam and polystyrene for insulation of facades, not only in private construction.
Thermopanels
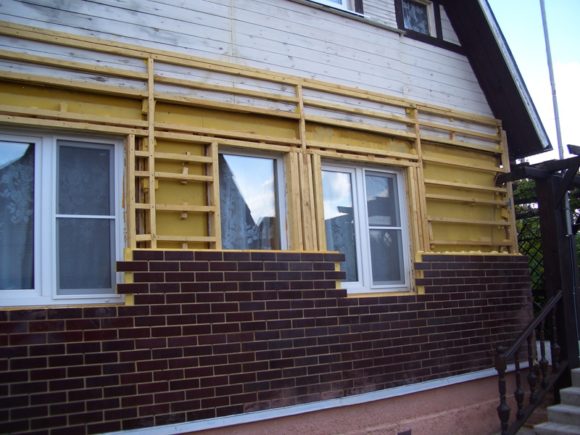
Composite material that is actively promoted for thermal insulation of facades. Thermal panels are a layer of insulation, more often - polyurethane foam, on top of which a clinker tile is applied. The result is a durable exterior material and a good looking finishing material with high thermal insulation characteristics. It is easy to work with thermal panels, when using the methods recommended by the manufacturer for fixing to the wall, the operating period is long. The main positive point of thermal panels is the great variety of the type of top coating and the speed of putting the insulation in place.
Thermal panels have one significant drawback, which lies in the high price of insulation. In addition to the specified, for fasteners, you need to use a special tool with which details of suitable parameters are cut out. Insulation using thermal panels in private construction is justified, but only in the case of preliminary alignment of the walls. This procedure is required, as thermal panels are not flexible.
Foamed Penofol
Penofol is a good option, since this heat-insulating material is convenient to use, and in itself is quite thin.Foaming foaming acts as a protection against moisture penetration and increases the indicator of the surface strength of the insulation. However, foil foamed foil, in the case of private construction for warming a house from the outside, is rarely used because of the high price of thermal insulation material.
The use of foamed penofol as the main insulation is not justified. This material is best used as a means of providing additional thermal insulation. The use of foamed penofol in the case of a professional approach to warming structures of the type “ventilated facade” is inefficient, often uncomfortable, and sometimes undesirable.
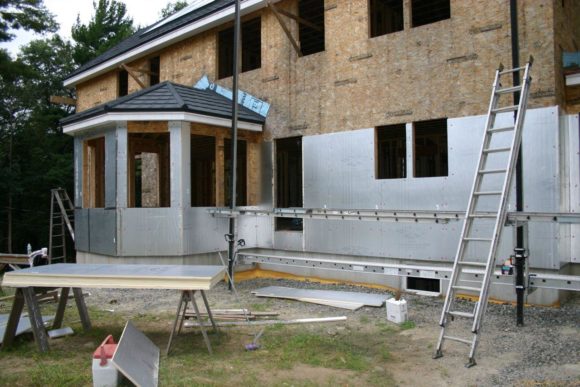
Foamed penofol is not included in the list of what is better to insulate the house from the outside because of the high price and the undesirability of using it as the main heat-insulating agent.
Sprayable heaters
There are several ready-to-apply thermal insulation products that are sprayed directly onto a cleaned and primed surface. But, such heaters are used in rare cases - when the characteristics of the facades meet certain criteria. The key, among the characteristics of surfaces that allow the application of sprayed materials, are the following:
- low strength;
- unattractive appearance;
- the need for UV protection;
- zero vapor permeability.
For example, penoplex as a heater, has a great price, but is durable and durable. And other types of sprayed thermal insulation compounds are relatively cheap, but they need a secondary finish. Such tools that are used more often than others include polyurethane foam. When solving two issues - the choice of material with which to insulate the house from the outside and how inexpensive it will be, polyurethane foam is a good option. She combines the following qualities:
- low cost of coverage;
- ease of application;
- low thermal conductivity.
But, the heat-insulating sprayed compounds can have one significant minus - an unattractive type of coating after solidification. This disadvantage is peculiar primarily to polyurethane foam. Nevertheless, if you organize a secondary finish with a lining, cover with adhesive for tiles or plaster, this negative property of the mounting foam can be leveled.
Masonry insulation
Thermal insulation using masonry materials is difficult to attribute only to the category of thermal protection of a residential building. The use of such tools is more related to the category of surface modification - the wall receives new characteristics using a layer of building material. Certain masonry heaters (aerated concrete) need UV protection. It is provided with a secondary finish. Masonry heaters have the following characteristics:
- Large layer thickness, unsuitable for facades of country houses.
- The high price of the material and the need to use a significant number of additional tools for mounting on the surface.
- Thermal insulation indicators do not correspond to the price and are average.
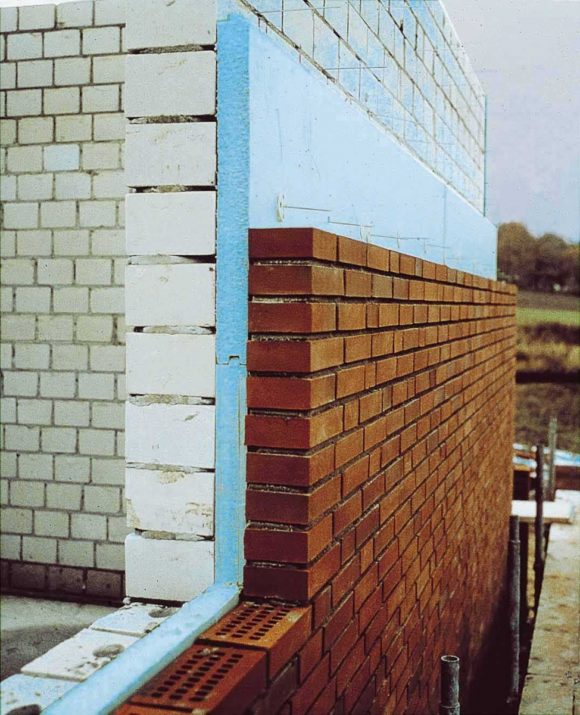
Masonry insulation can be a good option due to technological strength. These thermal protectors also provide a wide selection of recycled materials. In addition, the lack of combustibility and high vapor permeability values are a great advantage of masonry heaters over other types.
Why and how to insulate a house outside
External thermal insulation of private houses is done to maintain a comfortable temperature in residential premises in winter. The factor that has become key in solving this issue is often a large number of slots through which heat is blown out, or the weakness of the heat supply system. But, the main reason leading to heat loss is that the walls of the building are made of materials with a high thermal conductivity.
During insulation, only the external sides of the walls of a residential building are subjected to heat-insulating treatment. Internal insulation of surfaces leads to the fact that the heat insulation means blocks the access of heat directly to the wall. Because of this, the dew point shifts toward the room, humidity increases and condensation begins to occur. There are three main ways to warm the exterior of the walls of the house:
- Fasteners for the adhesive composition of thermal insulation products and subsequent plastering.
- Arrangement of three non-ventilated layers of the wall when the insulation is fixed with a solution. After leaving a small air layer and make the outer wall in 1 brick.
- Performing a facade with ventilation - a heater is applied over the waterproofing layer. It is covered with wind protection and sewn up with vinyl siding or other protective and decorative material.
Insulation of the house outside with mineral wool for siding is mainly carried out in the case of a facade with ventilation. But, choosing the option of warming private houses from the outside, you need to take into account that any method of thermal insulation has a certain technology inherent. At the same time, the rules for fixing insulating agents or applying heat-insulating compositions differ in the permissibility of their use in different weathers.
The technology of working with a specific heat-insulating material affects the time of year in which insulation work can be carried out.
Preparation of facades for insulation
After choosing a suitable heat-insulating agent for warming the outer part of the residential building, it is necessary to prepare the walls for applying or fixing this material. First of all, remove the old layer of plaster or other building and finishing composition from the outer surface of the walls. Upon completion of the plaster removal, the working area is cleaned of debris and dust. Then treated with a primer with high penetration rates. When there are recesses and other irregularities on the wall, they are pre-leveled with a solution, and the bulges are squeezed to one common level.
The choice and quality of the finish or the configuration of the cladding of a residential building depends on the evenness of the heat-insulating layer. To maintain the level, beacons and plumb lines are used. An anchor is fixed in the upper part of the wall, threads with plumb lines are fastened on them, which descend at an angle of 90 ° to the ground. At the same time, horizontal threads are used, stretched in level - together with vertical plumb lines, they create a surface control grid. This network is a guideline for the even location of the insulation on the wall or for fixing the guide metal network, on top of which a heat-insulating composition will be applied.
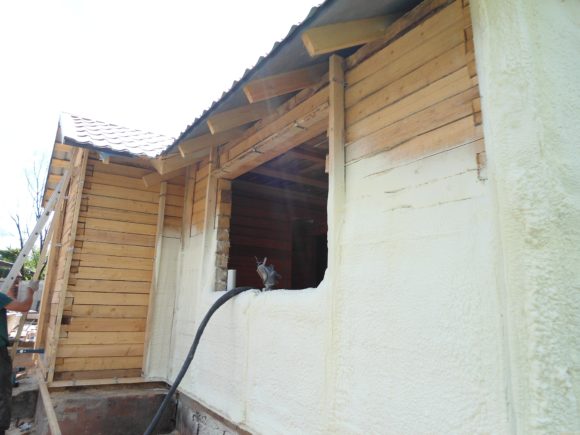
Methods of external insulation with foam and foam
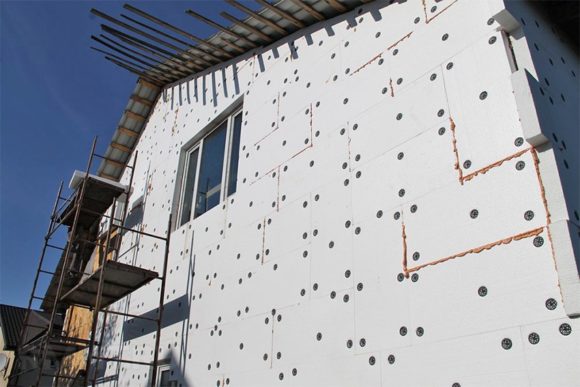
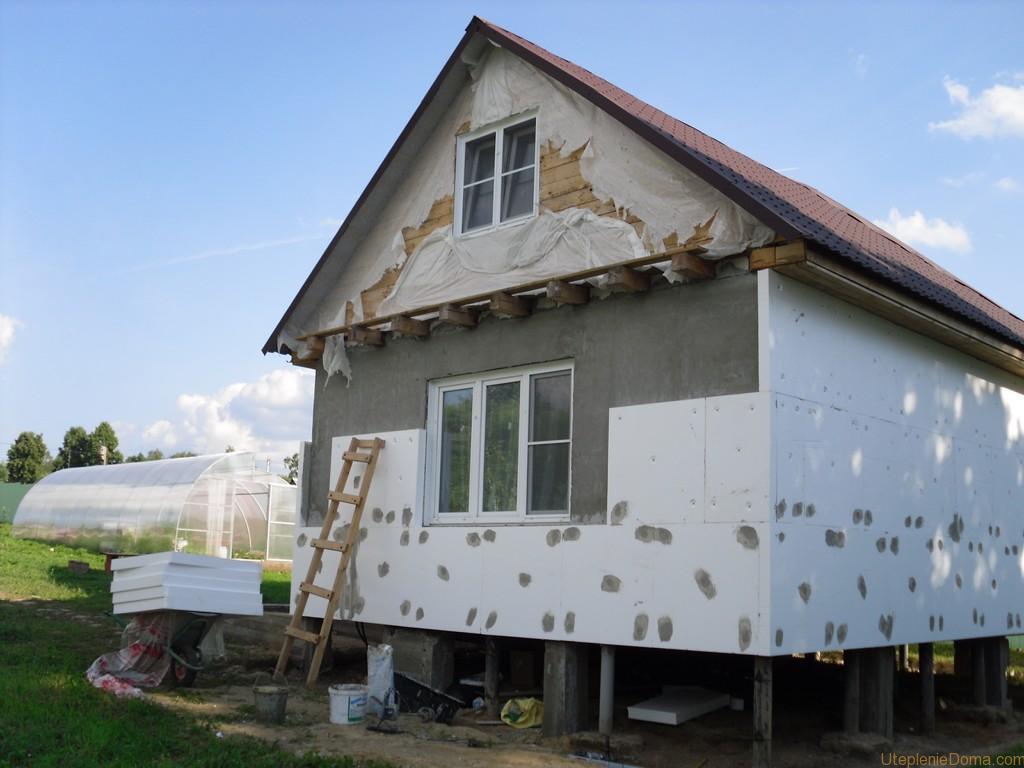
Warming the house from the outside with foam or polystyrene is simplified, since the installation of materials in the form of plates is facilitated. Before laying the insulation layer, the wall must be prepared. To do this, the surface is cleaned of previous coatings - paints, plasters, whitewash. After cleaning, the wall must be dried, since the foam can absorb moisture, which is why it loses its insulation properties. Fixation of plates is performed according to this algorithm:
- The surface of the plates is peeled off on one side to roughen. This will increase adhesion to the adhesive.
- Plates greased on the surface with glue are pressed firmly against the wall until they are fixed. Additionally, you can fix them with dowels with a wide hat.
- In the process of laying a foam or polystyrene, the evenness of the surface is controlled by level and plumb.
- After the first layer, it is recommended to impose a second with a displacement at the joints.
The edges of the wall and the area near the door and window openings provide a side from the corner. This will strengthen the corner places of the insulating material and close it from secondary influences.
After completion of installation work on insulation from the outside with polystyrene or polystyrene, a reinforcing mesh is fixed and plaster is applied. If you plan to use siding or wooden coatings (lining, block house, facing board, etc.), the process is adjusted. Before laying, prepare a crate of wooden battens or metal profiles, on which the facing material will be fixed.
Installation of mineral wool
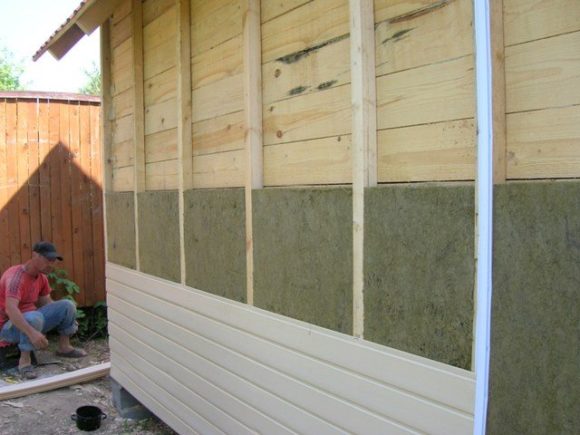
Mineral wool for surface insulation is made in the form of mattresses. It is more difficult to work with such material than with plates - to fasten this insulation, a crate is necessary. The distance between the rails or metal profiles is calculated according to the size of the sheet - the gap should be less by 5-10 mm. So, the insulation will be partially fixed in the crate. To fixation was sufficient, use dowels with a wide hat.
You can close the wall surface after warming with mineral wool with your own hands with any kind of siding or brick cladding. It is recommended to attach hydro-wind protection on the outer surface. Suitable for this are polymer film materials, including polyethylene. When it is necessary to insulate a house from a bar from the outside, it is better to use mineral wool with a different degree of density of layers - such mattresses are attached with the loose side to the wall.
Roof insulation
The house, which is in operation, is insulated from the roof on the inside of the rafters. External insulation is carried out only during the construction or overhaul of the roof. Mineral wool, polystyrene foam, polystyrene foam and expanded polystyrene in plates are suitable as insulation material. Additionally, you need to prepare a waterproofing film and materials for the crate. The insulation process includes the following steps:
- On top of the roof rafter system, waterproofing is laid with a sag of no more than 2 cm. The film is fixed along the roof - stripes from the edge. You can attach it with a construction stapler. Each next layer is lapped on the previous one.
- The crate is fixed on top of the waterproofing film - the distances between the main rails are 30-50 cm. The vertical rows should coincide with the rafters. If lumber is used, then it is treated with a protective primer before installation.
- The insulation is placed in pre-prepared cells, so that it does not protrude beyond the crate. In cold regions, 2 layers are recommended.
Any gaps between the slabs or mattresses are covered with foam. When laying more than one layer, it is recommended to glue them together with liquid nails.
If you used a material in the form of a mattress as a heater, you need to lay a second layer of waterproofing before closing the crate. As a ceiling, you can use a slab or other board. When all the insulation procedures are completed, you can lay the roofing material - slate, euroroofing material, tile, etc. If the roof is fixed with nails, then the location of the rafters is taken into account.
Foundation insulation technique
A significant loss of heat is caused by the lack of insulation in the area of the foundation of the house, since the floor is cooled. Condensation also forms in the basements, which leads to dampness and the development of molds on the walls. To insulate this part of the house from the outside, as a replacement for basalt wool, foam glass, pearlitum slabs, as well as expanded clay and other moisture resistant materials are used. The procedure is performed according to the algorithm:
- Foundation waterproofing - this process is easier to carry out even at the construction stage, otherwise it is necessary to prepare a trench along the perimeter. The surface of the foundation is cleaned of dirt and covered with a primer mixture, and waterproofing mastic is applied on top.
- A week after waterproofing the surface, a heater is fixed. For this, adhesive compositions with high adhesion and dowels with a wide hat are used. All plates fit tightly with a smear of each gap. A reinforcing network is fixed on top of the heat insulator.
- Before filling the soil, it is necessary to cover the surface of the wall with cement mortar. In the composition of such a plaster, solutions based on polyester resins can be added. At the bottom of the trench, it is recommended to lay a plastic pipe with holes along the length, as drainage.
After carrying out insulation work, the pit is covered with sand, expanded clay or fine gravel. Near the wall you need to make a blind area from 1 to 1.2 meters. The rest of the trench is sprinkled on top of the ground and rammed. The part that remains above the blind area can be additionally plastered, lined with tiles, bricks or covered with siding.
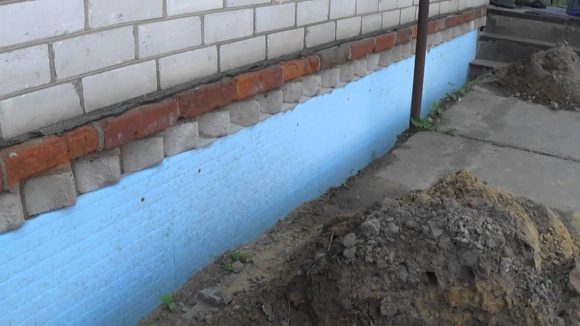
The blind area is made of concrete mortar, but the surface can be laid out with natural stone or courtyard tiles. Mandatory bias to the outside of the house and outflows under the drain pipes from the roof.
The technique of warming the veranda
If necessary, insulate a wooden house from the outside, you can not ignore such parts of the house as a veranda. This room is a place of great heat loss, since the walls are made of thin and light materials. Often there are options for a pile foundation under the veranda, which leaves a large gap between the floor ceilings of the room and the ground. Thermal insulation is carried out according to this algorithm:
- A trench is dug along the outer perimeter of the room to form a normal foundation up to 0.5 m deep. A wall is masonry in the trench or the space is covered with slate or asbestos sheet.
- The surface of the walls is cleaned of facing materials - paint, plaster, tile or siding. After preparing the crate with the capture of the ceiling in the trench - in the lower part it is better to use a metal frame.
- Plates or mattresses of heat-insulating material are laid between the rivers. It must be fastened to the adhesive composition using dowels with a wide hat. Near windows or doors, coat with sealants.
The ground part of the insulation is covered with a waterproofing solution and covered with gravel or expanded clay. In the upper part, you can use other types of facing materials. Under the plaster, it is necessary to fix a reinforcing mesh of polymers or metal. If additional waterproofing is needed, then polyethylene or other film polymers can be used.
Pipe insulation
Sewerage and water supply - those systems that are connected outside the house. In some cases, they are not provided with thermal insulation at the required level, because of which the water in the riser freezes or the drain becomes clogged. For insulation of communications, foil insulators, polystyrene foam, penoizol, polyurethane foam or basalt sleeves are used. To carry out the procedure, you need to dig out the place of the pipe insert into the house. The further process is carried out according to this algorithm:
- the pipe is cleaned of plaque and dirt;
- apply thermal insulation material;
- close joints with the wall with foam;
- wrap the heat insulator with polyethylene.
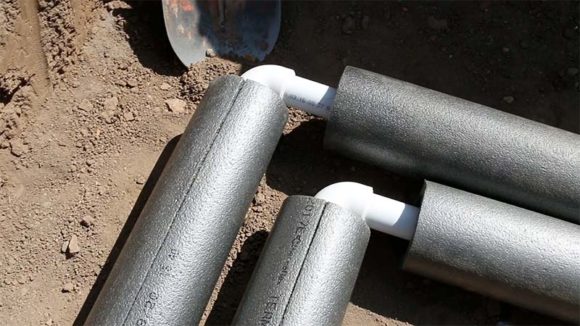
If the pipe was excavated, it is necessary to fill the pit with expanded clay and compact it from above with earth. After completing all the procedures for thermal insulation of a private residential building, the temperature in the room will increase markedly in cold weather, and will last a longer period after heating. If isolating the house from the outside is not possible, the whole procedure can be carried out from the inside, but this option will take away some space from the room.



Alas, no comments yet. Be the first!