For the construction of a carport for a car in the country, do not need special construction skills or large financial expenses. It is possible to erect a light building that protects the car from rain and ultraviolet sunlight in 1-2 days from practical, reliable, affordable materials.
Content
Variants of carports to protect cars from rain and sun
A simple construction on a summer cottage or a house adjoining territory for car protection is a roof mounted on four supports. To make a carport cheap for a do-it-yourself car, you need to approach the construction process in a practical way, pick up reliable and inexpensive materials.
As a building replacing the garage, you can erect a canopy:
- attached to a residential building, utility building or high fence. The structure is constructed of two pillars and an attached roof, fixed to a wall or fence;
- mobile, with the ability to move around the site and use for other needs. The structure has a roof mounted on four supports equipped with wheels;
- stationary, built on immovable, fixed in the ground, supports. The construction can be erected from any materials, be of various shapes.
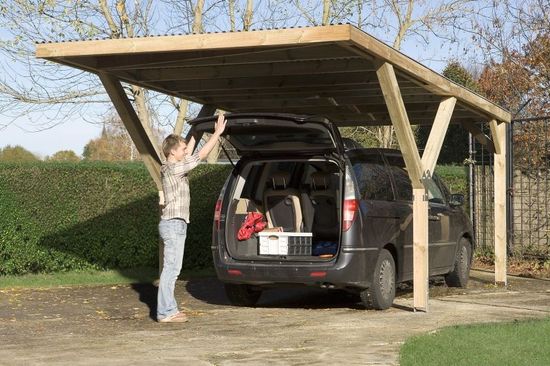
If necessary, a car canopy can be used as a gazebo during a picnic or, protecting from rainfall, a shelter for plants in mobile landing containers. The greatest protection for the vehicle will be provided by a building with end-walled walls.
Types of roof configuration and their advantages
It is important to pay attention to the issue of roof configuration. The carport to the cottage may have a different shape in the upper part. You can build a structure with a roofing system:
- gable (or hip). The classic form of the roof erected on residential private houses and outbuildings. The option provides a uniform gathering of precipitation, resistant to strong gusts of wind;
- single slope. The roof in the form of a single slope is erected most often during the construction of attached canopies. It is important to use durable roofing material and calculate the load so that the structure can withstand the weight of snow;
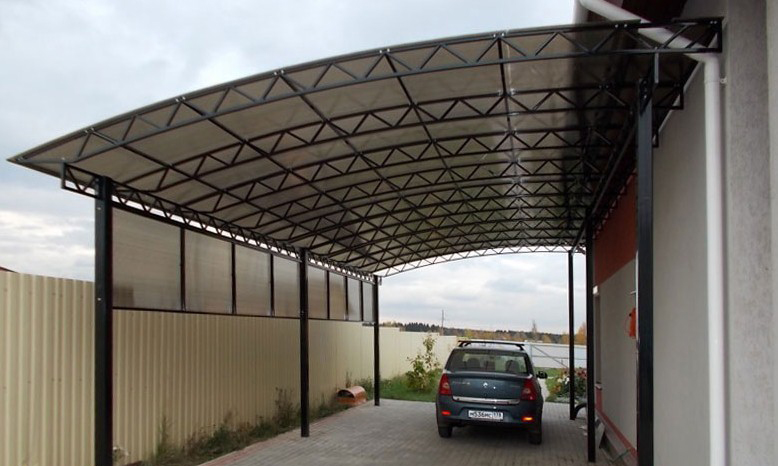
- arcuate or arched. With proper design calculation, the design will have high rates of stiffness and strength characteristics. It is possible both to attach to the building, and the construction in the form of a separate mobile or static structure.
So that the construction of a carport for a car is inexpensive and does not take much time, you can choose the option with a shed roof. In just one day, one person can build such a building with all the necessary materials and tools.
What should be the height of the car canopy
Before starting construction work, you need to calculate what size the building should have. The dimensions of the canopy for transport must take into account:
- car length.To this value add 20-50 cm to leave room for maneuvers;
- the height of the car. Consider the trunk and possible fixed load. The average height of buildings for car shelter is 2.0-2.5 m. You should not leave a lot of space under the roof in order to prevent ingress of slanting sediments;
- vehicle width. Calculate the value taking into account the free opening of doors on one or both sides, so that after parking you can leave the car without obstacles.
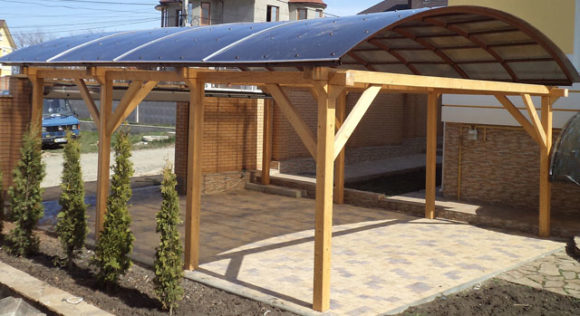
When planning the construction of a carport for two cars, add a margin of at least 0.5 m for comfortable parking.
Features placement of awnings in the country and near the house
To build a convenient and practical place to shelter a car from rain and sunlight, inspect the territory of your site according to a photo or plan of the location of objects. Choose where it will be more convenient to check in and park your vehicle freely under a canopy. It is most convenient to erect a structure near the gate, leaving room for maneuvers and turns, if necessary.
When planning to place two cars under one canopy, consider installing racks that support a heavy roof structure with a heavy roof in the middle. Additional are necessary to exclude sagging roofing material, even load distribution.
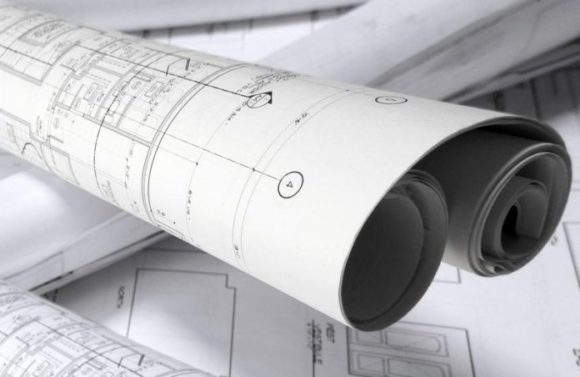
You can arrange a canopy along a residential building or outbuildings, erect a stand-alone structure, if the area allows or to attach the structure. Make a drawing of the planned object with the help of special engineering programs or draw a sketch on the paper in compliance with the scale:
- front view;
- side view;
- sectional top view;
- projection in three planes;
- the location of the object relative to the plane of the site and other structures;
- apply all dimensions (length, width, height of the building, dimensions of supports, roofs, roofs, foundation elements, walls).
A detailed drawing will help to clarify all sizes, calculate the right amount of materials, visually assess the success of the location, the possibilities of the route and parking.
Features of the supporting structure
The supports of a car canopy in the country house or in a private area experience the main load - the rafter system, the roof and the rainfall that collects on the roof. It is important to build racks from reliable and durable materials to ensure the stability and durability of the structure.
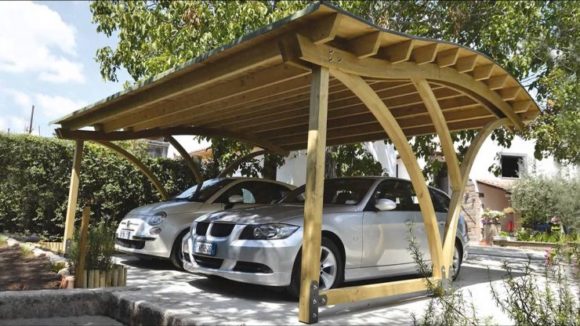
For the construction of a canopy for a vehicle, the supports can be:
- from a brick;
- from wood;
- from metal.
Budget options include wood racks. They are lightweight, do not require a powerful foundation, and are easy to install.
For a car canopy, at least 4 supports or 2 racks are required if you are building an attached structure. To achieve the best stability and even load distribution, plan the placement of support columns in increments of 1.5 m along the longitudinal sides.
Stone, concrete, brick
A concrete, stone or brick support system may require the use of special construction equipment to lift heavy elements to a height. Stone or reinforced concrete pillars require installation on a stable foundation.
The advantages of staging pillars from stone or reinforced concrete materials are:
- durability;
- undemanding repair and maintenance;
- resistance to stress and environmental impact.
The option with massive stands cannot be built on swampy soils or lands with a high level of groundwater. Soil movement during seasonal snowmelt can provoke subsidence of racks.
Metal
Metal support poles need a careful selection of materials. To erect a canopy, use tube-rolling elements or a metal profile of rectangular cross section with a diameter of at least 8 cm.
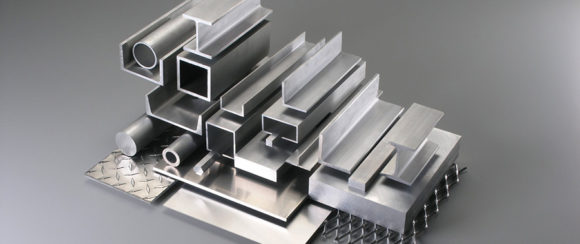
When building an automobile canopy on metal racks provide;
- reliable fastening to soil;
- metal processing from rust;
- application of protective anti-corrosion compounds.
With timely processing from corrosion, metal poles will last at least 30 years, are resistant to temperature extremes, mechanical stress, and can withstand high loads. For metal frame structures, a welding machine and welder skills are required.
Wooden
Building a wooden support system is faster and easier than racks made of metal materials, brick, concrete. As pillars holding the roof, you can use:
- a log with a diameter of at least 20 cm;
- wooden block with a minimum cross section of 20x20 cm.
For structural stability, wooden poles need to be strengthened in the ground. To erect a canopy with a height of 2-2.5 m, you will need lumber not less than 3 m long. A tree under the influence of natural phenomena, temperature and humidity changes can crack, deform, rot, be attacked by pests. Treat the supporting elements with special impregnations that protect the system from bugs, grinders, and mold formation.
Necessary tools
To build a carport on your own site, prepare the necessary tools, the number and variety of which depends on the project being implemented. You will need:
- bayonet shovel;
- saw;
- hacksaw;
- screwdriver;
- ladder;
- rope;
- building level;
- roulette;
- pegs for marking.
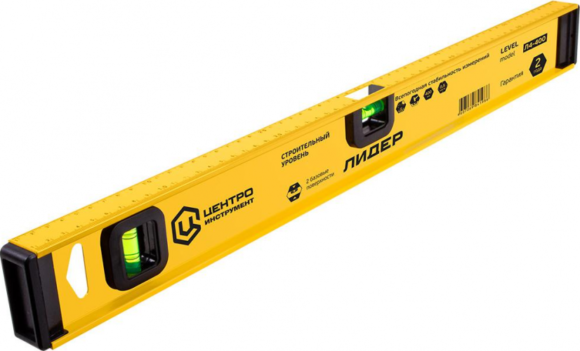
Pay attention to safety during construction work. During the erection of the structure, ensure that there are no children or animals on the site. Work in overalls, a headdress, convenient strong training, gloves, goggles.
Preparatory work
Before starting construction, make calculations of the necessary materials and their quantities. Detailed drawings will help you calculate how many support pillars, elements for the frame, and the erection of the roofing system are needed. Buy the entire volume at once so that all components are from the same batch. This will eliminate the difference in characteristics, color, quality and will allow you to get an aesthetic reliable structure to protect the vehicle.
To build a carport, pay attention to the foundation under the supports. Strong fastening of the racks in the ground is the key to the stability of the structure and its long operation.
Be sure to carry out the design of the future building with the application of the building on the site plan. This is necessary to determine the exact place of construction. Choose a flat area with easy entry. Consider reversing the vehicle or leave room for maneuvers. Strengthen the surface of the substrate under the future canopy and the path to it using gravel, laying paving slabs, concrete, wooden flooring.
Site Preparation
Provide free access to the construction site, arrange all the necessary building materials nearby, leave free territory for cuts, processing elements. When working with an electric tool, carry out an extension cord to connect the devices to the network. Choose dry, calm weather to get started. In spring, wait for the land to dry completely and lower the groundwater level.

Prepare the platform for the canopy in the following sequence:
- remove green spaces, disassemble buildings;
- level the area if necessary with special equipment or embankment from quarry sand;
- mark the future perimeter of the structure with pegs and rope;
- outline the installation segments of the support elements.
Choose a free day with suitable weather. Depending on the complexity of the structure being built and the type of support fastening, the construction process can take from 1 to 14 days.
Installation of supports
After purchasing and delivering the necessary building materials, preparing the site and marking, proceed with the installation of poles that will hold the canopy.Depending on the selected material, follow the proposed algorithms:
- wooden racks. Dig 50 cm down in the ground using a drill or a shovel. Treat with moisture protective composition the edges of the supports that will be fixed in the ground. For added protection, wrap the trunk of a wooden block or log with roofing material. Experienced builders advise filling the pit with a pillar with concrete mortar made from sand and cement of the M100 or M200 brand;
- metal supports. Dig into the grooves with a drill 0.5-0.7 m. Place pipes treated with anticorrosive agents or metal profiles. Compact the soil around the buried posts or fill with concrete mixture;
- stone pillars. Under heavy racks make stable bases. Dig a hole with a diameter of 40-50 cm, fill the bottom with gravel and quarry sand 10-15 cm high. Organize the formwork from an unedged board or rolled roofing material with a lead to the earth's surface of 10-15 cm. Fill the formwork space with concrete. To strengthen the structure, add metal reinforcement, broken brick, stones, gravel. After the concrete has dried, erect the supports. Place concrete blocks with a spread of fixing mixture. Masonry produce 1.5 bricks.
| Brand of cement used | Concrete mixture drying time, days | |||
| 0 | +10 | +20 | +30 | |
| M150-M200 | 21 | 14 | 7 | 5 |
It will take 1-3 weeks to fully dry the concrete composition and start safe construction work, depending on temperature, humidity, weather conditions. In sunny hot weather, cement-sand mortar hardens faster. Monitor the level of the installed rack using special instruments.
Erection of a roof
To erect the roof on the exposed pillars, it is necessary to make a frame of crossbars. As the basis for the roofing system, you can use:
- metal profile or pipe with a diameter of 80 mm. Lay the elements on the base of the racks and fix them between themselves and to the supports with the help of hardware, welding or brackets;
- a wooden block with a section of 15x15 or 20x20 cm. Place the cross-beams on the installed pillars of stone, concrete or wood. Fasten all elements with pins or pins. Treat the material with special impregnations;
- concrete beams. A crane is needed to lift the finished reinforced concrete elements. This type of material for crossbars can only be installed on stone and brick poles.
On the installed tier of the roof base, erect the rafter system depending on the type of car canopy. For a gable roof on the ground, collect the corners from wooden boards or metal, fasten perpendicular to the surface in increments of 1-1.5 m, build a crate. For the single-slope option, lift one of the sides of the roofing system using a wooden block or metal profile, connect the raised angle to the supports without additional elements, install the cross members in increments of 30-50 cm for attaching the roofing material. Assemble the arched roof on the ground - bend metal or polycarbonate into an arc of at least 10 degrees and fix it to a rigid base (metal corner or wooden frame) using hardware.
Schemes and drawings of canopies
To choose which carport to build, look at the photos of the various options. When choosing, rely on the following factors:
- available free space on the site;
- convenience of arrival;
- nearby buildings, additionally protecting against oblique precipitation.
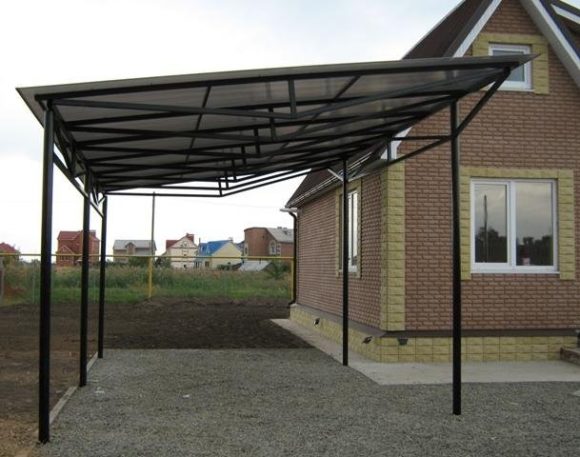
For a compact setting of the building with limited space, an attached canopy is suitable.
- A durable canopy on brick pillars with a metal roof will last at least 30 years.
- The airy structure on a welded frame covered with polycarbonate looks modern and harmonious on the site.
- The through structure allows the machine to move around the site without obstacles.
- Reliable protective construction for two vehicles.
- Compact and lightweight mobile canopy.
- A car canopy with sewn end walls will reliably protect the vehicle from oblique rain, gusty wind, hail.
How to make a polycarbonate canopy
For the construction of a polycarbonate canopy, use a metal profile or wooden block in the assembly of the frame. The weight of the supporting elements and the mass of the polycarbonate sheet do not require a powerful foundation. Build the structure in the following sequence:
- dig poles on the marking;
- put the cross-pieces on the tops of the racks and fix them;
- install the rafter system depending on the invented project (in 1 or 2 slopes);
- fasten the crate throughout the roof in increments of 0.5-0.7 m to ensure an even load on the polycarbonate;
- cut segments from polycarbonate to cover slopes;
- fasten polycarbonate sheets with metal mounts with rubber gaskets;
- close the joints with plates of metal, polycarbonate, etc .;
- set the skate.
For the arched version of the roof, fasten the polycarbonate material to the prepared frame made of a metal corner or a wooden block, bend the polycarbonate sheet so that it forms an arc, fix it to the opposite edge, fixing this position.
Among the advantages of using polycarbonate material, one should note its affordable price, durability, ease of installation, color diversity, resistance to stress and weather, the ability to experience bending, light scattering. For car canopies, choose polycarbonate with a thickness of at least 16 mm.
How to build a wooden carport
A wooden building to protect the machine is one of the simplest, quickest and cheapest designs. To build a canopy of wood, buy a beam, unedged board, roofing material, hardware and impregnation that protects wooden elements from moisture, fungus, insects.
Carry out the construction as follows:
- establish support of their bar or log. Along the longitudinal walls add 1-2 additional racks;
- lay on the top of the pillars the tier of the base of the rafter system;
- build rafters on top of the upper grillage, if a gable roof is provided;
- make a crate of slopes with a step of 30-50 cm;
- fix the roofing material (slate, roofing material, tile, polycarbonate, sheet iron, ondulin) on the batten boards;
- treat all wooden parts of the canopy with a special composition against decay.
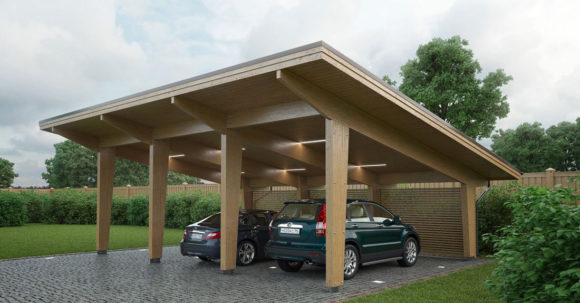
It’s even easier to install a one-piece canopy. Install supports with different heights - two poles 2.5 meters high from the ground and two posts 2.0 meters high. Connect the tops of the support system with crossbars, lay the rafters to evenly distribute the load, fix the roofing material.
Metal carport
A metal building that protects the vehicle from the sun and precipitation is erected from a pipe or metal profile. If you have welding skills, you can install the structure in 1-2 days.
- A metal canopy is constructed as follows:
- dig 4 metal racks;
- weld on top of a cross-member from a metal corner;
- build a rafter system;
- sew the slopes with roofing material (ondulin, profiled sheet, sheet iron, polycarbonate).
To increase the life of the building, treat all elements with protective compounds - wood impregnated with rot, metals - anti-corrosion agents.
To fasten the roof to the metal frame, use hardware with rubber washers. This method eliminates the leakage of the roof.
Mobile canopy
A mobile canopy is a convenient design that will protect the machine in a limited space of its own area or in the country. Choose the lightest materials to assemble a building equipped with wheels.
To build the simplest mobile canopy, follow the step by step algorithm;
- assemble from a tree (for example, a 10x10 wooden block or a thick board) or a metal corner (30x30) a light frame in the form of unisexual trapeziums;
- fasten the wheel pairs at the base. Install the wheels not only along the edges of the structure, but also in the middle of the longitudinal sides to facilitate movement;
- place cross-bars on top to secure polycarbonate or other lightweight material;
- fix the roofing material to the crate;
- build handles in the form of brackets to make it convenient to move the structure.
To move the mobile canopy, make a firm, level surface. On the ground, sand or gravel embankment, the wheels may become stuck in a soft substrate.
Conclusion
A carport built in the country house or on your own site will protect the vehicle from rain, hail, snow, and scorching sunlight. Under the indoor compact building, you can repair cars or have picnics in the open air during bad weather. For the construction of the building does not require a large number of building materials, tools and financial expenses. With a rational choice of the project, you can build a protective structure in 1-2 days.



Alas, no comments yet. Be the first!